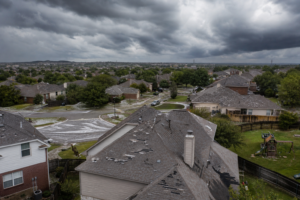
After a storm damages your roof, what you do in the next few days matters more than most homeowners realize. Insurance claims are built on evidence. The better your documentation, the clearer the story your claim tells — and the harder it is for a dispute to derail the process.
This is practical guidance, not legal or insurance advice. Every policy and situation is different. But these documentation steps apply to nearly every residential roof damage claim.
Step 1: Record the Date and Event
This sounds basic, but it’s foundational. Insurance claims are tied to specific loss events. When did the storm occur? What time did it start? What was the nature of the event — hail, high winds, both?
Write it down immediately. Check local weather service records for your zip code, which document storm events with timestamps and hail size reports. This official record is often used by adjusters and is worth having in your file. The Storm Prediction Center and National Weather Service archives are publicly accessible and can confirm the event independently.
Step 2: Photograph Everything — Before Any Repairs
Do not make permanent repairs before documenting the damage. Temporary measures to stop active leaking — tarping, for example — are appropriate and expected. But altering the condition of the roof before an adjuster sees it can complicate your claim.
What to photograph:
- The roof surface from multiple angles. Zoom in on visible damage — missing shingles, cracked tiles, dented metal, granule loss patterns.
- Gutters and downspouts. Granule accumulation after a hail event is significant evidence.
- Any water intrusion inside the home. Ceiling stains, wet insulation in the attic, water marks on walls near the roofline.
- Other property damage from the same event. Damaged HVAC units, fence damage, dents on metal mailboxes or air conditioning fins. These support the narrative that a significant storm event occurred.
- Your vehicle, if it has hail dents. Vehicle damage from hail is another independent corroboration of the event.
Use your smartphone with location services on so photos are geo-tagged and time-stamped. Back them up to cloud storage so they don’t disappear if your phone is lost or damaged.
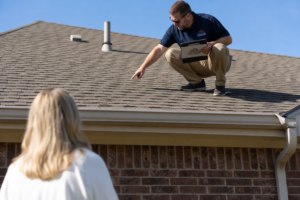
Step 3: Get a Professional Inspection Before the Adjuster Visit
This step makes a real difference. An insurance adjuster is employed by the insurance company. They are generally trained and fair, but their job is to assess the damage as the insurer sees it. A certified roofing contractor inspecting your roof independently gives you your own assessment — one that documents damage from the perspective of someone whose job is to protect your home, not the insurer’s bottom line.
If there’s a discrepancy between what the adjuster finds and what a qualified contractor found, you have documented grounds to request a re-inspection or dispute the scope of loss.
Get the contractor’s inspection report in writing. It should include the date of inspection, specific damage found with photos, affected areas by location on the roof, and the contractor’s assessment of whether the damage resulted from the storm event.
Step 4: Keep All Records in One Place
Create a claims folder — physical or digital — that contains:
- Weather service documentation of the storm event
- All photos with timestamps
- The contractor’s inspection report
- Your insurance policy declarations page
- All correspondence with your insurer (emails, letters, claim numbers)
- The adjuster’s scope of loss document when you receive it
- Any contractor estimates
Having everything organized means you can respond quickly if your insurer asks for documentation, and you have a complete record if any disputes arise later.
Step 5: Understand What’s in the Adjuster’s Report
When you receive the adjuster’s scope of loss and claim decision, review it carefully. Specifically:
- Does it list all the damage areas your contractor identified?
- Does the scope match what you documented in photos?
- Is the payment calculation based on ACV or RCV? (See your policy.)
- Are there items excluded with specific reasons listed?
If something seems wrong or incomplete, you have the right to request a re-inspection or submit a supplemental claim. Your contractor’s documentation is your best support in that conversation.
How Divided Sky Helps
Divided Sky provides thorough written inspection reports with photos for homeowners navigating insurance claims throughout Central Texas. We’ve worked alongside hundreds of claims in San Marcos, Kyle, New Braunfels, Wimberley, and Dripping Springs. We understand what adjusters look for, and we document damage in a way that tells a complete story.
We don’t manage your claim for you — that’s between you and your insurer. But we make sure you have accurate, well-documented information about what’s on your roof. Schedule your free inspection here.