Finding the best location for your satellite dish can significantly impact the quality of your television or internet signal. Selecting the right spot isn’t just about picking a convenient place; you also need to maximize signal strength and minimize potential disruptions.
Several factors influence signal reception:
- Obstructions like trees and buildings
- Weather conditions such as snow and ice
- Proper alignment to the specific satellite
We’ll provide you with simple steps to find the best location for your satellite dish, ensuring you get the most reliable signal possible.
Understanding How Satellite Dishes Work
Satellite dishes play a crucial role in receiving television signals from satellites positioned in geosynchronous orbit. These satellites remain fixed relative to the Earth’s surface, ensuring a constant stream of data to your dish. When you set up your satellite dish, it captures signals transmitted by these satellites and directs them to your receiver, enabling you to enjoy your favorite TV channels.
Key Elements in Signal Reception
- Azimuth Angle: This is the compass direction you need to point your satellite dish towards. Accurate azimuth alignment ensures that your dish is aimed correctly at the satellite.
- Elevation: This refers to the vertical angle between the dish and the horizon. Proper elevation adjustment is vital for clear signal reception.
Common Satellites
Several satellites provide television services across different regions. Some of the most used include:
- Astra 2
- Eurobird
Importance of Proper Alignment
It’s essential to align both the azimuth angle and elevation accurately. Misalignment can lead to weak or disrupted signals, affecting your viewing experience. Using a neighbor’s dish alignment as a reference can be helpful if you’re unsure about the correct positioning.
Understanding these basics will assist in setting up your satellite dish correctly, ensuring optimal performance and uninterrupted television service.
Key Factors to Consider When Choosing a Location for Your Satellite Dish
-
Unobstructed View
For optimal signal reception, having a clear line of sight to the Southern sky is crucial. Trees, buildings, and other structures can interfere with the signal, leading to poor reception or complete signal loss. It’s important to ensure there are no obstructions in the path between your satellite dish and the satellite in orbit.
Common obstructions:
- Trees: Branches and leaves can block or weaken the signal.
- Buildings: Nearby structures can cast shadows that affect signal strength.
- Weather: Snow and ice accumulation on the dish can degrade signal quality.
-
Recommended Installation Distance
The ideal installation distance from your house is about 4-6 feet. This range offers a good balance between stability and signal quality. Installing the dish too close to the house may result in interference from walls or rooflines, while placing it too far away might expose it to environmental factors like wind.
Benefits of maintaining a recommended distance:
- Stability: Reduced risk of interference from nearby structures.
- Signal Quality: Clearer path for signal travel without unnecessary obstacles.
-
Alternative Locations for Satellite Dish
Sometimes, mounting the satellite dish directly on your house isn’t feasible due to space constraints or potential interferences. Exploring alternative locations such as patios, back decks, or garages can be beneficial.
Advantages of alternative mounting locations:
- Patios/Back Decks: Often provide a stable surface and an unobstructed view of the sky.
- Garages: Can offer elevation and protection from ground-level obstructions.
Ensuring a stable mounting surface wherever you choose to place your dish is essential for maintaining consistent signal quality. A secured metal rod or pole can also provide flexibility in placement while avoiding common issues like obstructed views or unstable installations.
Installation Considerations for Your Satellite Dish
Professional vs DIY Installation
When deciding between professional installation and a DIY approach, several factors come into play:
Professional Installation:
- Pros: Certified installers bring expertise, ensuring optimal alignment and secure mounting. They handle complex tasks like drilling fasteners and sealing problem spots to prevent leaks.
- Cons: Higher upfront costs. Scheduling might require waiting for an available appointment.
DIY Installation:
- Pros: Cost-saving potential and flexibility in scheduling. A sense of accomplishment from completing the task yourself.
- Cons: Higher risk of improper installation, leading to poor signal quality or increased chances of roof leaks. Lack of specialized tools might result in less precise alignment.
Preventing Roof Leaks During Installation
Ensuring your satellite dish doesn’t compromise your roof’s integrity is crucial. Here are some techniques to prevent roof leaks:
- Rubber Sheets Under Footplates: Placing rubber sheets beneath the footplates of the mounting bracket acts as a barrier, protecting against water ingress.
- Sealing Problem Spots with Roofing Tar: Apply roofing tar around drilled holes and fasteners to seal any potential entry points for water. This step is essential, especially in regions prone to heavy rainfall or snow.
Aligning Your Satellite Dish for Optimal Reception
Satellite Dish Alignment Tips
Achieving the best performance from your satellite dish involves meticulous alignment. Here are some key steps to ensure optimal reception:
Find the Azimuth and Elevation Angles:
- Use a satellite dish alignment calculator or app to determine the specific azimuth (horizontal angle) and elevation (vertical angle) required for your location based on the satellite you wish to connect with.
Adjust the Azimuth Angle:
- Rotate your dish horizontally until it faces the correct direction. A compass can be quite helpful for this step.
Set the Elevation Angle:
- Tilt the dish vertically to match the elevation angle provided by your alignment calculator. Ensure this angle is precise to avoid weak signals.
Fine-Tune with LNB Adjustment:
- The Low-Noise Block downconverter (LNB) receives signals reflected by the dish. Adjust its skew (rotation) to match the polarization of incoming signals, which is crucial for avoiding signal interference and maximizing strength.
Secure All Adjustments:
- Once aligned, tighten all bolts and screws to maintain the dish’s position even in adverse weather conditions.
Utilizing Signal Meters
Using a signal meter can simplify aligning your satellite dish:
Connect the Signal Meter:
- Attach the signal meter between your LNB and receiver using coaxial cables.
Monitor Signal Strength:
- As you adjust the azimuth and elevation angles, watch the meter’s readout for signal strength indicators. Higher readings signify better alignment.
Fine-Tuning with Real-Time Feedback:
- Make small adjustments while monitoring real-time feedback from the meter to pinpoint optimal positioning.
Check Multiple Satellites:
- If available, switch between different satellites on your meter to ensure broad compatibility and fine-tuned reception across multiple sources.
Aligning your satellite dish correctly ensures clear, uninterrupted signal reception, enabling you to enjoy your television services without hassle. Proper LNB adjustment and using a signal meter make this process efficient and effective.
Understanding Regulations and Compatibility Issues with Satellite Dishes
Regulations in Residential Complexes
When installing a satellite dish in an apartment or residential complex, it’s essential to be aware of the FCC regulations. These rules are designed to protect your right to install a satellite dish while ensuring it doesn’t interfere with the property’s structural integrity or other residents’ rights.
Key Regulations to Know:
- FCC Over-the-Air Reception Devices Rule (OTARD): This rule allows tenants and homeowners to install satellite dishes up to one meter in diameter on areas they control, such as balconies, patios, or private yards.
- Landlord Restrictions: While landlords can impose reasonable restrictions for safety and aesthetic reasons, they cannot prevent you from installing a dish outright if it meets OTARD criteria.
Understanding these guidelines helps ensure your installation is compliant and avoids potential conflicts with property management.
Property Compatibility Assessment
Choosing between a roof-mounted or ground-mounted satellite dish depends on your property’s characteristics:
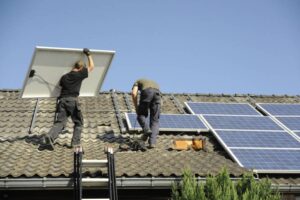
- Roof-Mounted Installations: Ideal for properties with limited yard space or where height is required to avoid obstructions. However, it’s crucial to assess the roof’s condition and seek professional opinions from certified roofers. They can evaluate whether your roof can handle the additional load without compromising structural integrity.
- Ground-Mounted Installations: Suitable for properties with ample outdoor space. Ground mounts offer flexibility in positioning but require a stable surface to avoid signal disruption.
For both types, consulting with professionals ensures that the installation not only provides optimal signal reception but also maintains property safety and compliance.
Roofers Aiding Satellite Installation Troubles
Finding the best location for your satellite dish ensures optimal performance and longevity. By considering factors like an unobstructed view, proper installation distance, and stable mounting surfaces, you can achieve clear signal reception without interruptions.
Consulting with professionals can make a significant difference. Local roofing experts like Divided Sky provide invaluable assistance with roof-mounted installations. We’ll ensure your satellite is securely installed without causing damage to your roof.
If you need guidance on what is the best location for your satellite dish or require professional installation support, don’t hesitate to reach out!
FAQs
What is the best location for installing a satellite dish?
The best location for your satellite dish is one that provides an unobstructed view of the Southern sky. This ensures optimal signal reception, free from interference caused by trees, buildings, or other obstructions. It’s also recommended to install the dish 4-6 feet away from your house for better stability and signal quality.
How do satellite dishes work?
Satellite dishes function by receiving television signals transmitted from satellites in geosynchronous orbit. The dish collects these signals and focuses them onto a receiver. Key factors such as azimuth angle and elevation play a significant role in ensuring proper signal reception.
What should I consider when choosing a location for my satellite dish?
When selecting a location for your satellite dish, consider having an unobstructed view of the Southern sky, maintaining an ideal installation distance of 4-6 feet from your house, and exploring alternative mounting locations such as patios or garages. Each location should provide a stable mounting surface to ensure optimal performance.
Should I hire a professional installer or attempt DIY installation for my satellite dish?
Deciding between professional installation and DIY depends on your comfort level with home improvement tasks. Hiring a certified installer can mitigate risks associated with improper installation, such as leaks or poor signal quality. If you choose to do it yourself, ensure you are aware of techniques to prevent roof leaks during the installation process.
How can I align my satellite dish for optimal reception?
To align your satellite dish effectively, follow step-by-step guidance that emphasizes LNB alignment to avoid weak signals. Using a signal meter can help ensure that your dish is positioned correctly for the best performance.
Are there regulations regarding satellite dishes in residential complexes?
Yes, there are FCC regulations that govern the installation of satellite dishes in apartments and residential complexes. It’s important to be aware of these regulations and assess property compatibility based on whether you are using a roof-mounted or ground-mounted installation.


