You had a storm. You think your roof took damage. You need to figure out the insurance process and you are not quite sure where to start.
This is where a lot of Central Texas homeowners feel stuck. The process involves multiple parties, has its own vocabulary, and can feel like it favors the insurance company. It does not have to be that way. When you understand how the process works, you can move through it confidently and make sure the settlement you receive reflects the actual damage.
Here is how it works.
Step 1: Document Damage Before Anyone Touches the Roof
Before a repair crew patches anything or a roofer starts work, document what you can see. Photograph your gutters, downspouts, any visible soft metal like flashing or skylights, window screens, and any debris on the ground. If you have hail dents visible on A/C units or painted surfaces, photograph those too. These are called “test points” and they help establish that a hail event occurred at your property.
You do not need to get on the roof yourself. Most of the documentation that matters for establishing the event will come from your professional inspector.
Step 2: Get a Professional Inspection First
Many homeowners go straight to calling their insurance carrier before they have any documentation. That is backwards. File too early without supporting evidence and the adjuster comes out, finds limited obvious damage, and closes the claim. Getting that decision reversed later is harder than doing it right the first time.
Schedule an inspection with a reputable local contractor first. A thorough inspection will document damage by slope, identify the size and pattern of hail impacts, note any functional damage to shingles, and check all penetrations and flashings. This gives you a clear picture before the adjuster arrives.
You also want to check the NOAA Storm Events database or local weather reports to confirm a documented storm event at your address on a specific date. Insurance carriers verify this, and having the documentation makes the initial conversation cleaner.
Step 3: File the Claim
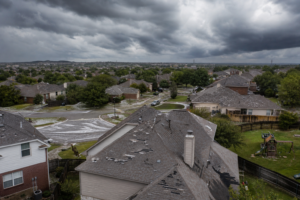
Once you have documentation from your inspection and confirmation of a storm event, contact your insurance carrier to open a claim. You will be assigned a claim number and an adjuster. The adjuster’s job is to assess the damage and determine what your policy covers.
Texas insurance policies generally require you to file within one year of the date of loss. Do not wait. Even if you discovered the damage eight months after the storm, acting now keeps your options open.
Step 4: The Adjuster Visit
Your insurance adjuster will schedule a time to inspect the roof. This is where having your contractor present makes a real difference.
When your roofing contractor attends the adjuster inspection, two things happen. First, the contractor can point out damage the adjuster might otherwise miss or move past quickly. Adjusters see many roofs in a day and may not give every penetration or valley the time it deserves. Second, you have a professional advocate who speaks the adjuster’s language and can discuss scope items in terms that translate directly into the estimate software the adjuster is using.
This is not about gaming the system. It is about making sure the scope of loss is complete and accurate.
Step 5: Understanding the Estimate
The adjuster will produce an estimate, typically using Xactimate software, which is the industry standard. This estimate breaks down the work into line items with costs per square foot, per unit, or per linear foot depending on the item.
Key terms to understand:
RCV (Replacement Cost Value): What it costs to replace the damaged item at current market prices, with no deduction for age or wear.
ACV (Actual Cash Value): RCV minus depreciation. This is typically what you receive in the initial payment.
Recoverable Depreciation: The difference between RCV and ACV. Once the work is completed and you submit your final invoice, most policies release this amount as a second payment.
Deductible: Your responsibility before the insurance pays. Texas policies may have a separate wind and hail deductible, often expressed as a percentage of your dwelling coverage. Know your deductible before you start the process.
Step 6: Reviewing the Scope and Supplementing
The initial adjuster estimate is not always final. Contractors who work regularly with insurance claims will review the scope line by line and identify anything that was missed or undervalued. This is called supplementing the claim.
Common items that get missed in initial estimates: code-upgrade requirements for current permits, removal and replacement of specific components that were not fully scoped, satellite dish or A/C line set detach and reset, step flashing that was not itemized. A contractor who knows the process can submit a supplement to the adjuster with supporting documentation, and the carrier will review it.
This can add meaningful value to your settlement. It is a legitimate part of the process.
Step 7: Contractor Selection and Scheduling
Once your claim scope is approved, you choose your contractor and schedule the work. You are not required to use a contractor your insurance company suggests. That is your choice.
Choose a contractor with verifiable local credentials, proper insurance, and warranty offerings that match the scope of the job. GAF Master Elite contractors can offer extended workmanship warranties backed by the manufacturer, which is worth asking about.
Step 8: Final Documentation and Second Payment
After work is complete, submit your final invoice to your carrier. They will release the recoverable depreciation holdback at that point. Keep all documentation: the signed contract, the permit, and the completed job photos. You will want these if any question arises about the work or the warranty.
Working With Divided Sky on Your Claim
Divided Sky has helped homeowners across San Marcos, Kyle, Buda, New Braunfels, and Wimberley through this process many times. We attend adjuster inspections, review claim scopes, and handle supplements when the initial estimate misses items. We do not promise a specific outcome, and we do not make decisions for your carrier. But we make sure the damage is fully documented and the scope reflects the actual work needed.
A free inspection is the right place to start. We will tell you what we see, and you take it from there.
